primedocs Web
primedocs Web runs entirely in your web browser; on your PC, your mobile phone or your tablet. This way you can create your documents from primedocs anywhere.
If your company has primedocs Web, you will be informed about the correct web address.
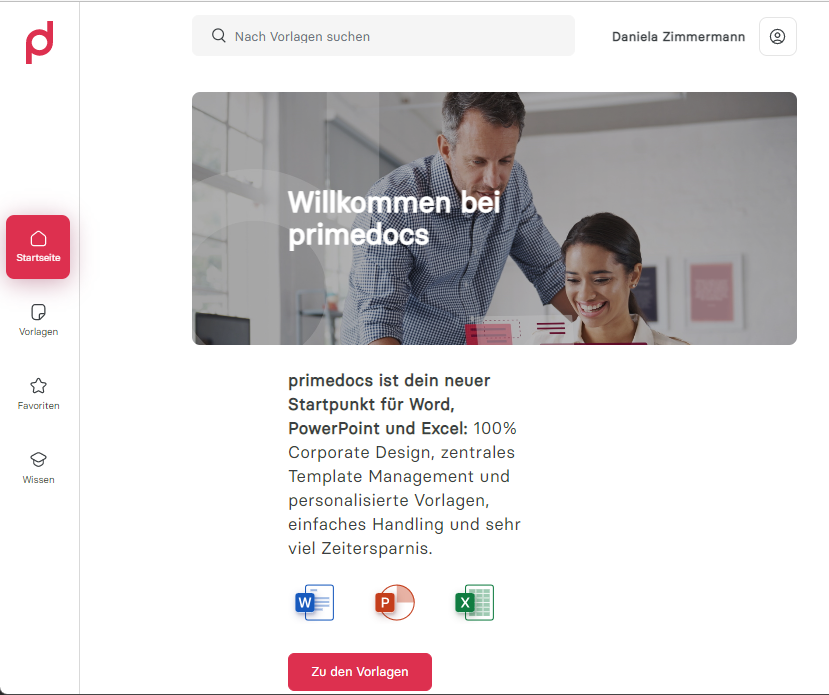
This is the homepage of primedocs Web. If you have already used primedocs Web, it displays the templates that you last used.
Navigation bar
On the left of the screen you can use the navigation to select the Home page, the Templates area, your Favourites and the Knowledge area. The latter leads you to the primedocs Help and to primedocs AI.
Top bar
Across the top you have a search field where you can quickly find a specific template.
On the top right you see your name and a button to the right of it. This button leads you to the user settings and to your profiles.
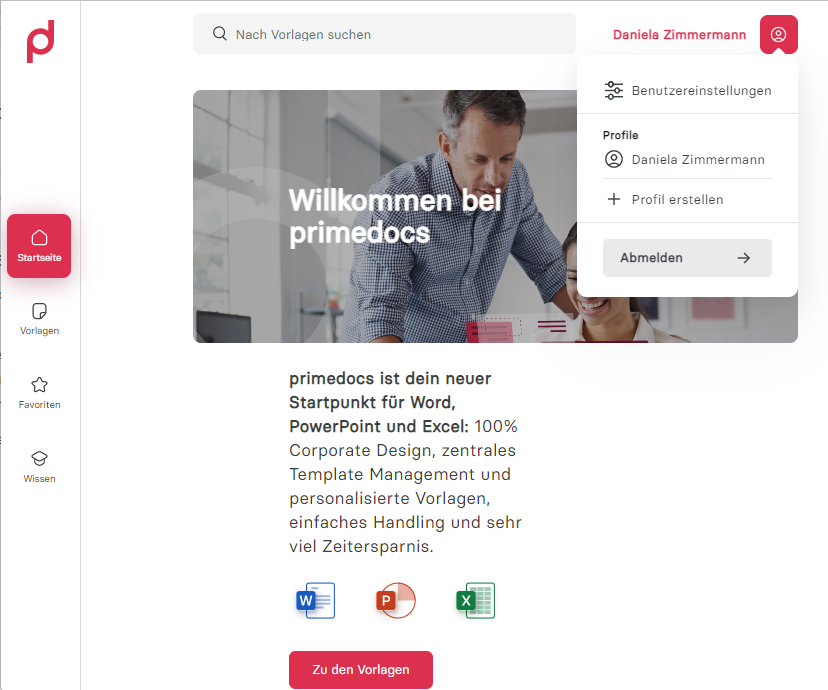
Profiles
In this example the user has one profile. By clicking on a profile you navigate to its overview and settings page.
By clicking Add profile you can create even more profiles (e.g. if you have several roles in your company).
User settings
By clicking on User settings you can make the following settings:
- The interface language in which primedocs Web is shown
- The document language that should be preselected when you create documents
- The colour theme
Finally, you can also complete your user data in all languages activated by your company.
If you are using primedocs Web for the first time, we recommend that you check your data in the user settings and complete the empty fields. If the data is incorrect, please contact your company administrator.
Once you have made your settings, click on Save.
Templates
Click on Templates in the navigation bar.
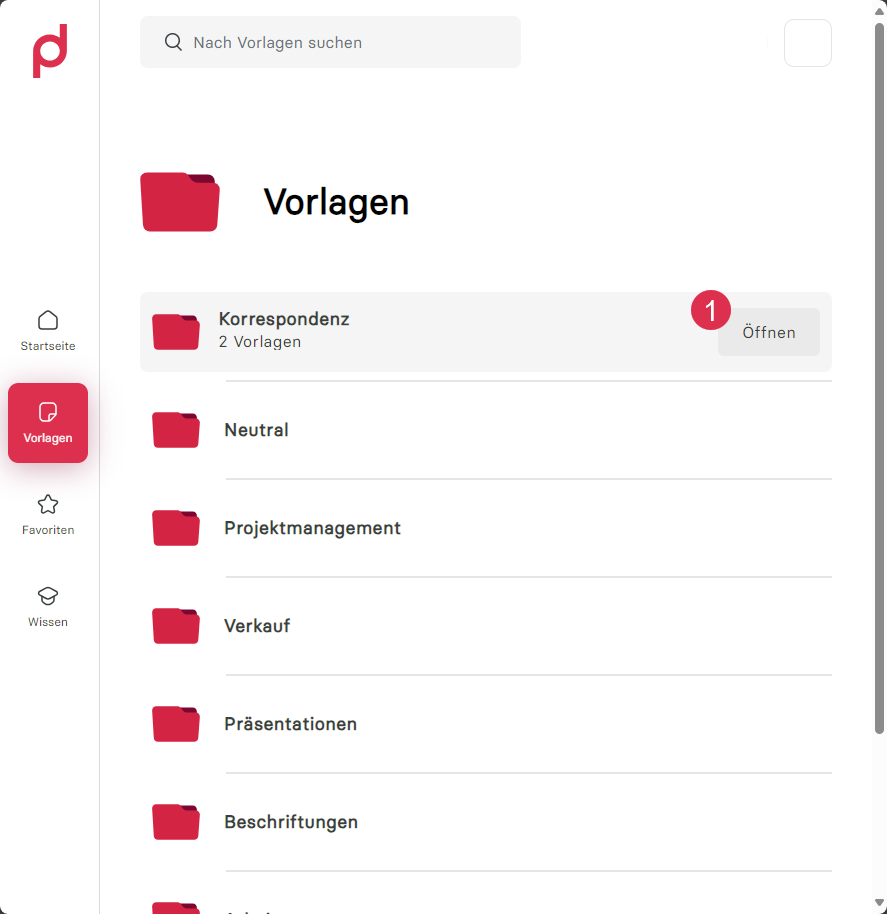
Template group overview
If you hover over a template group, the Open button (1) appears. Click on Open to open the template group.
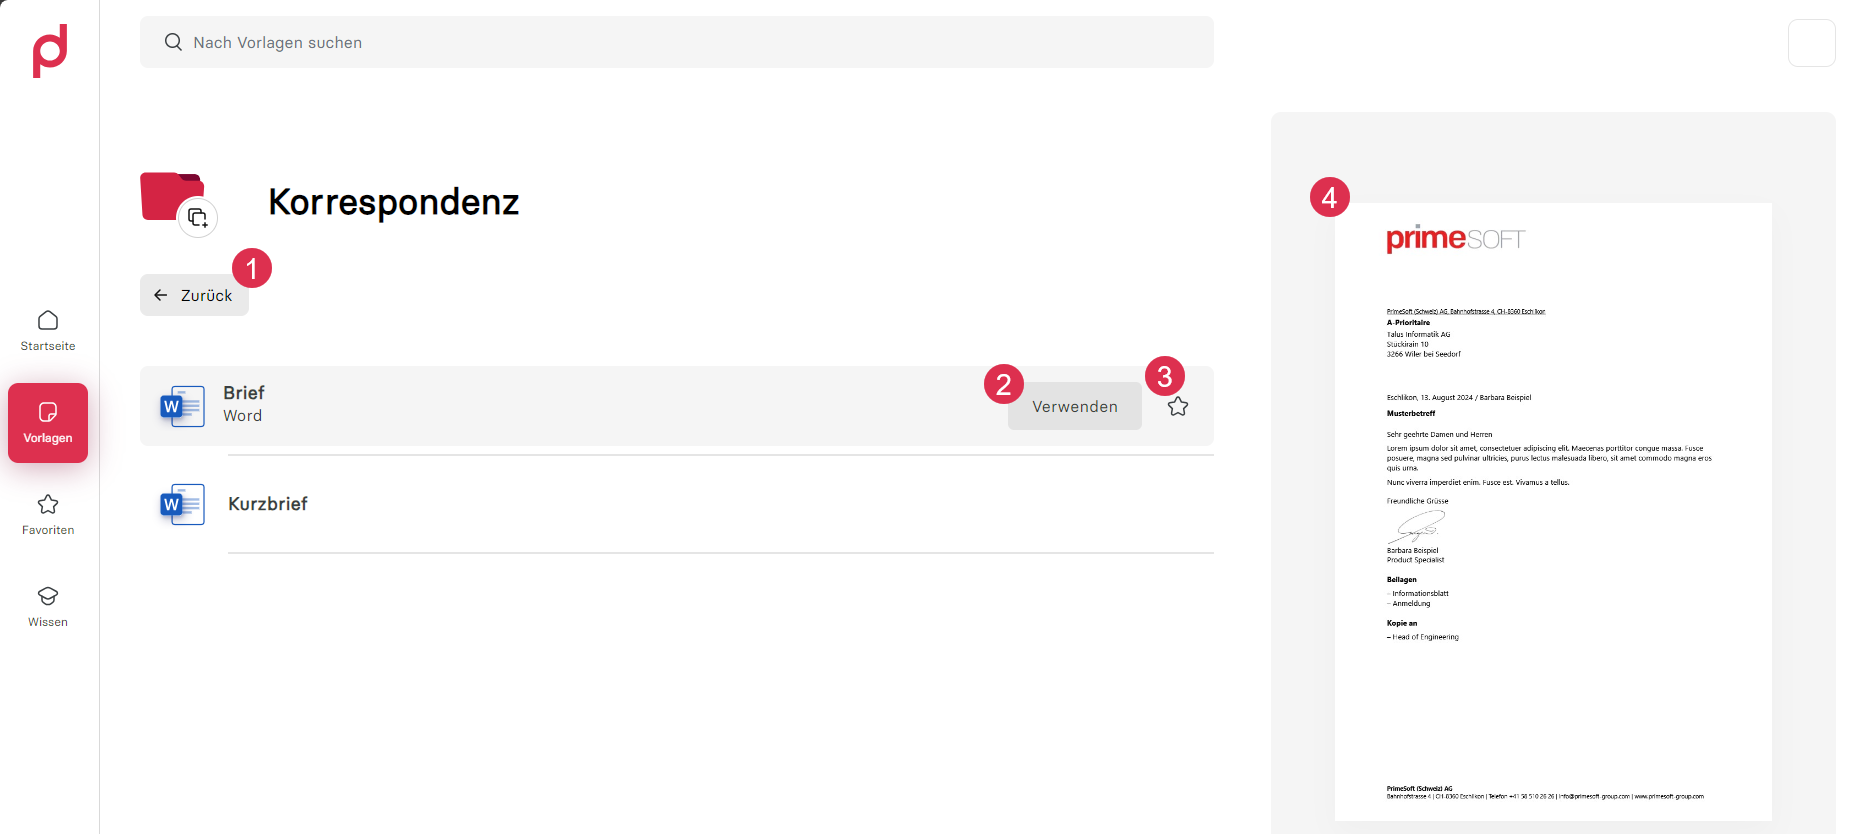
Templates overview
From a template group, you can use the Back button (1) to return to the overview of all template groups.
If you move the mouse over a template, the Use button (2) appears. Click on Use to create a document from this template.
You can add a template to your favorites using the button with the star icon (3). A preview image (4) is also displayed on the right-hand side if one has been created.
Creating a document
Once you have selected a template, a form, i.e. the properties, is displayed.
Fields marked with * are mandatory and must be completed. If they are not filled in, the document cannot be created.
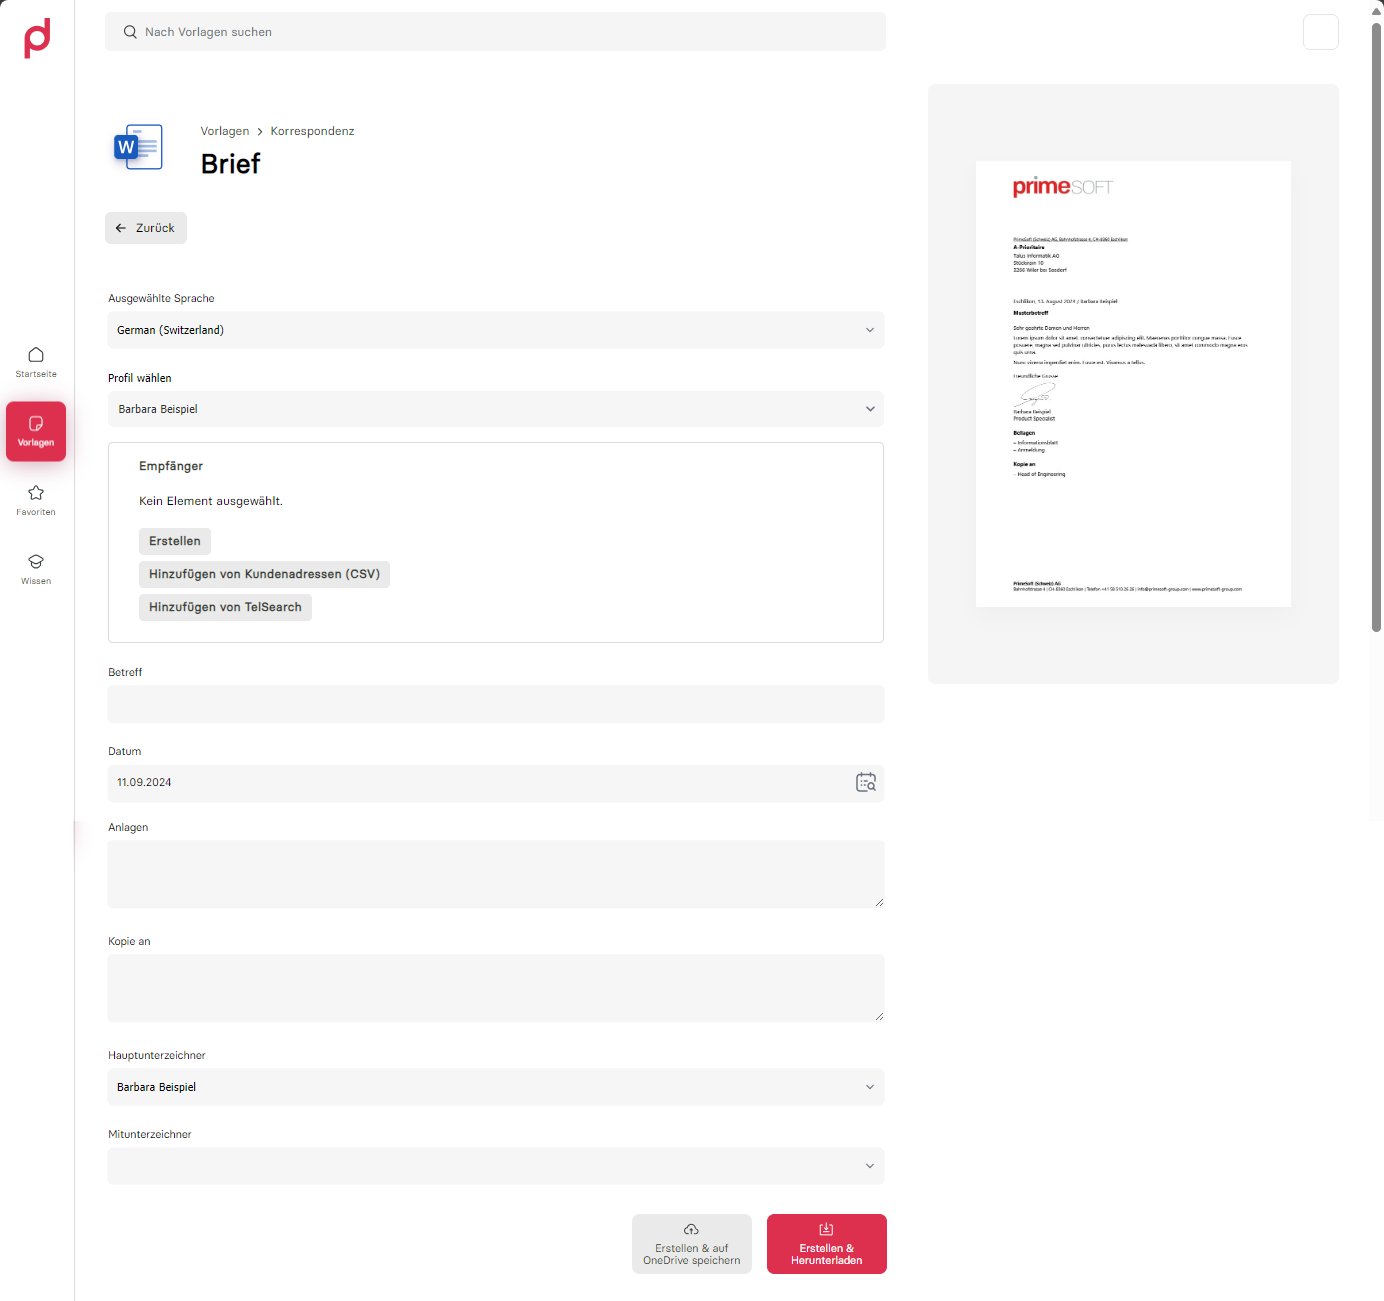
Basic settings
First select the document language via the Selected language selection. Then select which profile you would like to create the document with via Select profile.

Fill in further fields
Then fill in the remaining fields.
The fields that are displayed may differ considerably from our solution, depending on the template and configuration.
Create or select recipient
In this example of a letter template, a recipient is required. The element can be created manually (A) or searched for and selected in the available data interfaces (B).
Create recipient manually: Click on Create (A), fill in all the fields (1) and save (2) the recipient.
Select recipient from data interface: Click on a data interface. Fill in the search fields (1) and click Search (2). Select the desired recipient using Add (2).
Select additional profiles
If you have created a letter, you may be able to select additional profiles.

Sensitivity label
For templates that offer more than one Microsoft sensitivity label, an additional Sensitivity field appears in the form. Select the desired label before creating the document. The visual markings configured on the label (headers, footers, watermarks) are applied during creation.
If sign-in is required first, a hint banner with a sign-in button for the connected service appears.
Download document
Click on Create & Download, and the document is created and downloaded from your browser to your device.
Save document to OneDrive
Click on Create & save to OneDrive, and it is created and you can open it directly in SharePoint in your browser.
If the Windows app primedocs Desktop is not installed, no primedocs add-in is displayed in the Office application.
Connect mode
When primedocs Web is launched from a third-party system via a Connect Session, a banner "Connect mode is active" appears at the top. It indicates that document creation uses the data from the Connect Session (including the template name, if known). Use the close button to leave Connect mode.
Executions
Running and completed document generations (e.g. series generation) are shown via a button at the bottom left as Executions. For each entry the list shows the template, the output name, the start time, and the status (Running, Completed, or Error). For completed executions with a downloadable result, a Download button is available.
Connected services
Some data sources or features (e.g. sensitivity labels) require sign-in to a connected service. On the Connected services page you can sign in to and out of each service; a checkmark indicates a successful sign-in.
If an action (e.g. starting a Connect Session) requires sign-in, the "Login required" dialog appears with the affected services. Sign in and then click Retry.
Favorites
The favorites that have been selected in the Templates area can be found in this area.
Here you can also remove templates from the favorites by clicking on the star icon (1). You can also create a document from here (2):

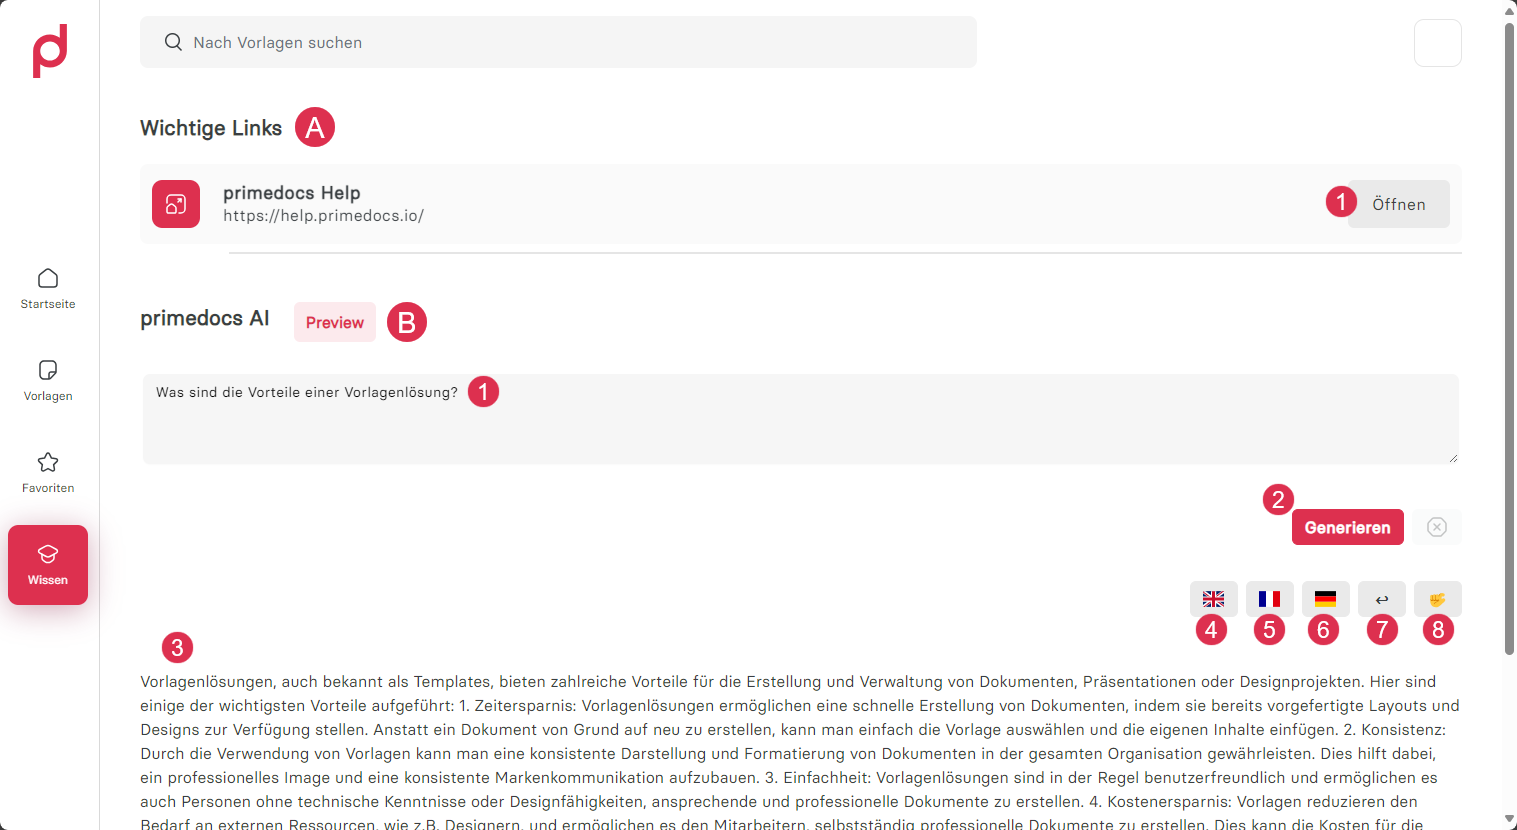
Knowledge
In the Knowledge section, you will find important links (A) as well as a preview of the primedocs AI (B), which can help you when editing a document created with primedocs.
The primedocs AI (B) is particularly suitable if you are currently creating a document or an article. Ask the AI a question or give it a text for revision with as precise an instruction as possible. Then click on Generate (2).