primedocs Desktop
primedocs Desktop consists of two main parts: the primedocs App and the primedocs Add-Ins.
primedocs App
The primedocs Desktop app is a stand-alone desktop application for the PC (Windows) that gives you easy access to all templates from a single location. Generate documents, create and edit profiles or share your own profile. The primedocs app is used in particular by Layouters.
The primedocs app contains two main tabs: Templates and Organization.
Starting primedocs for the first time
As soon as primedocs is installed and the application is started for the first time, the setup wizard appears. Click Next here.
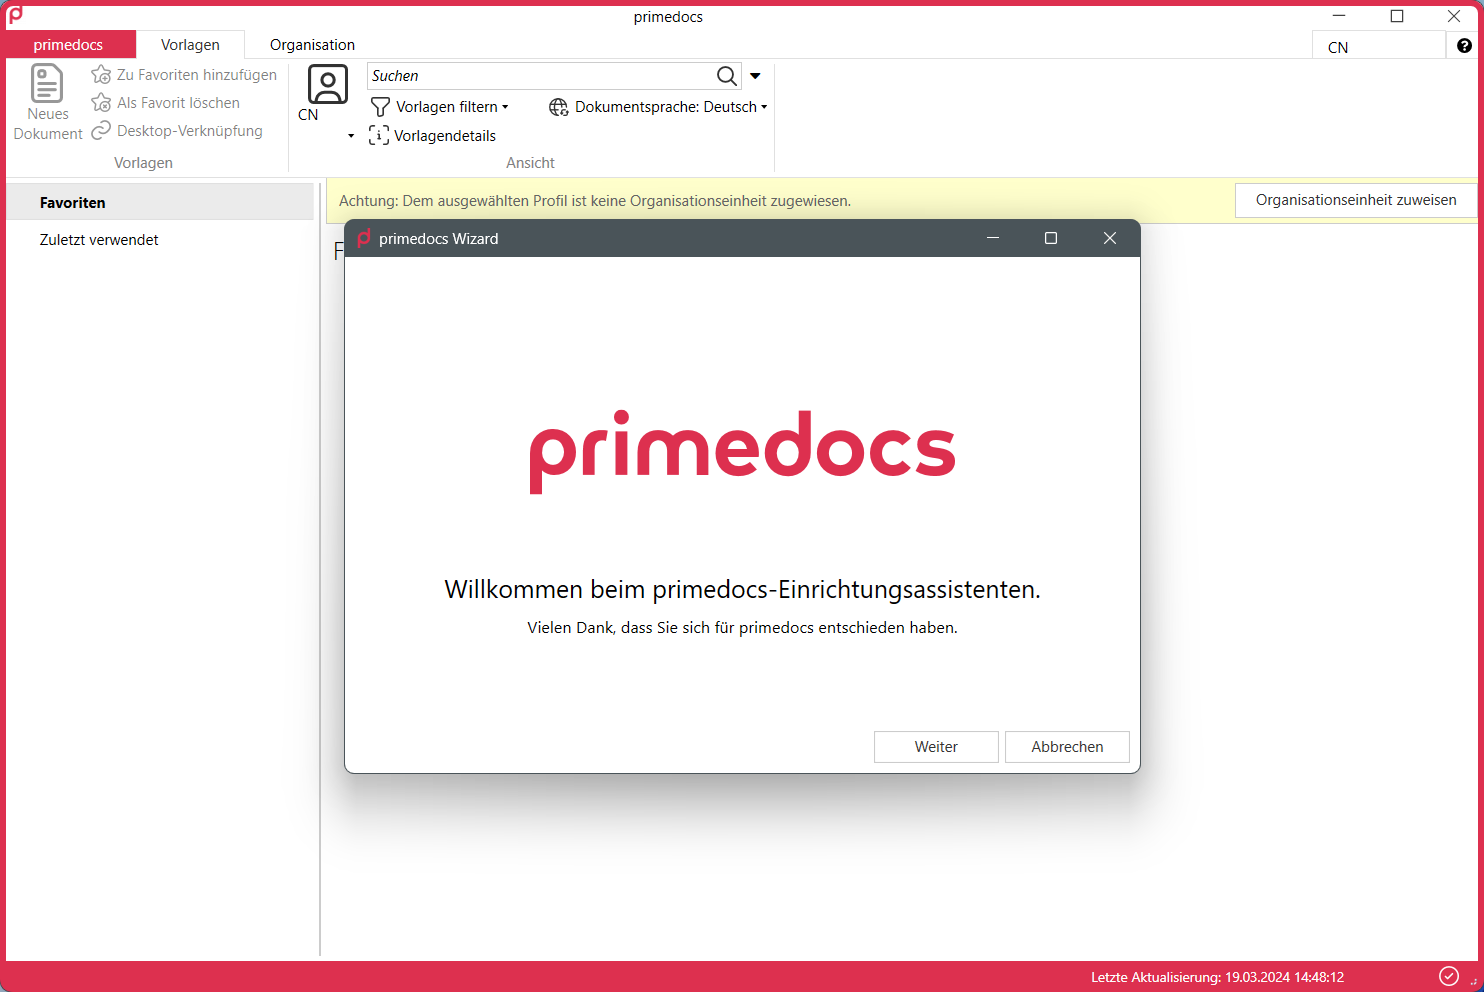
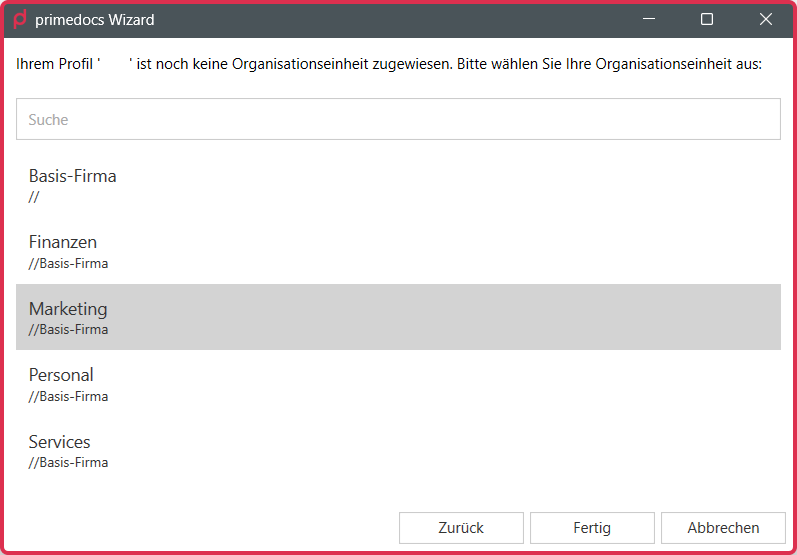
In principle, you should already be assigned to an organizational unit. If this is not the case, you can view the organisational units released for you here in the next step.
Select your organizational unit and click on Done.
If no organizational unit is displayed, please contact your company's internal support. They can carry out the corresponding authorisation.
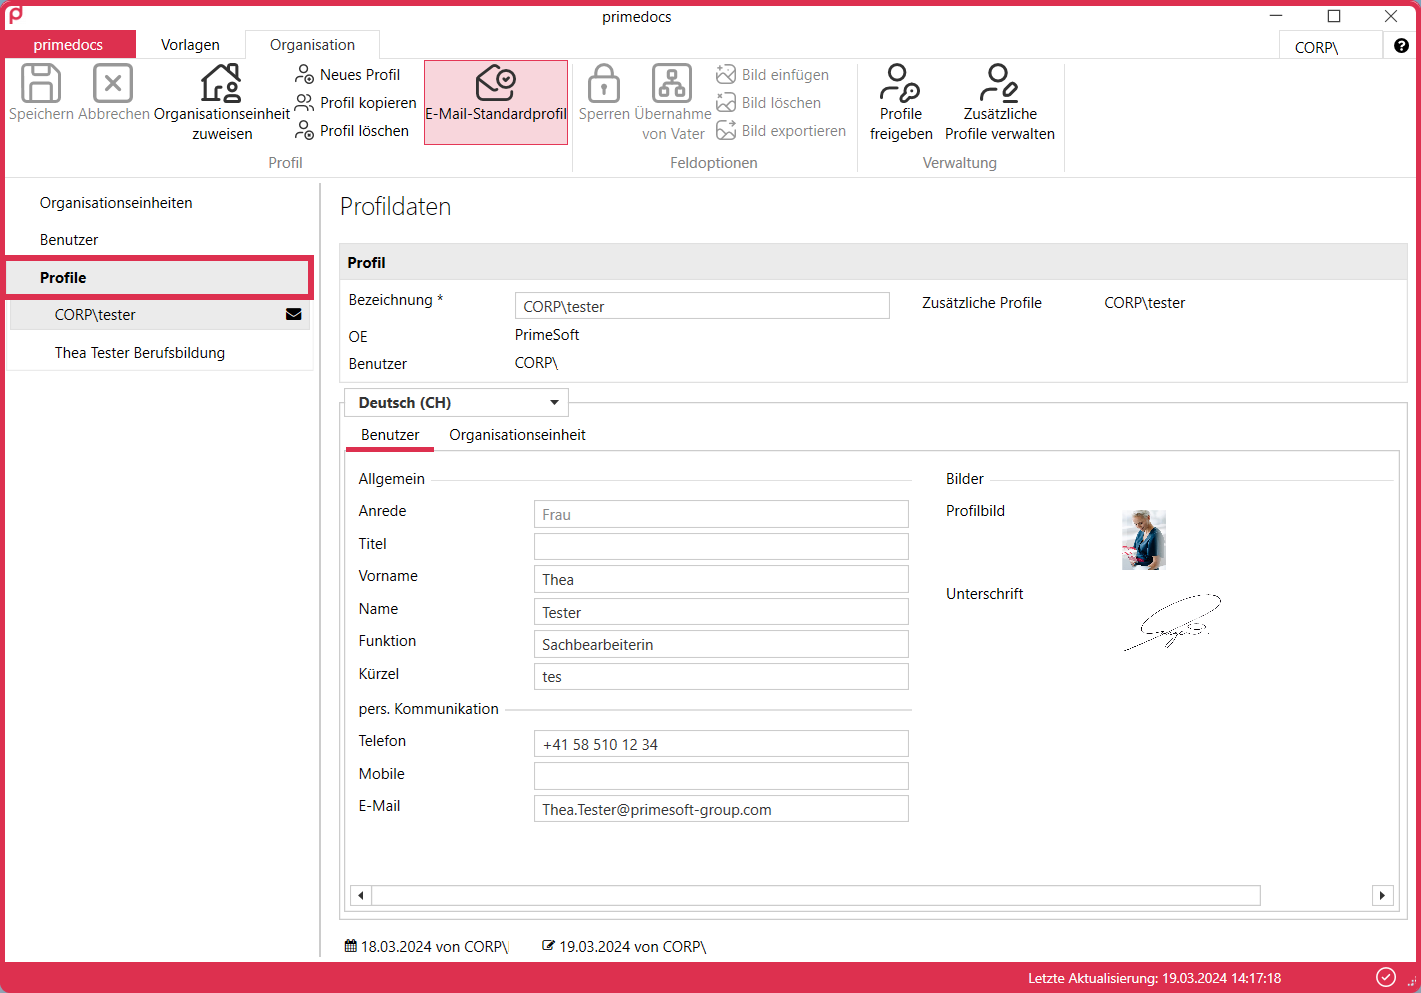
Select the Organization tab. You will find your user data in the Users category in the area on the left. Check all personal details here and complete them if necessary. Confirm the check of your data with Everything ok in the yellow info bar.
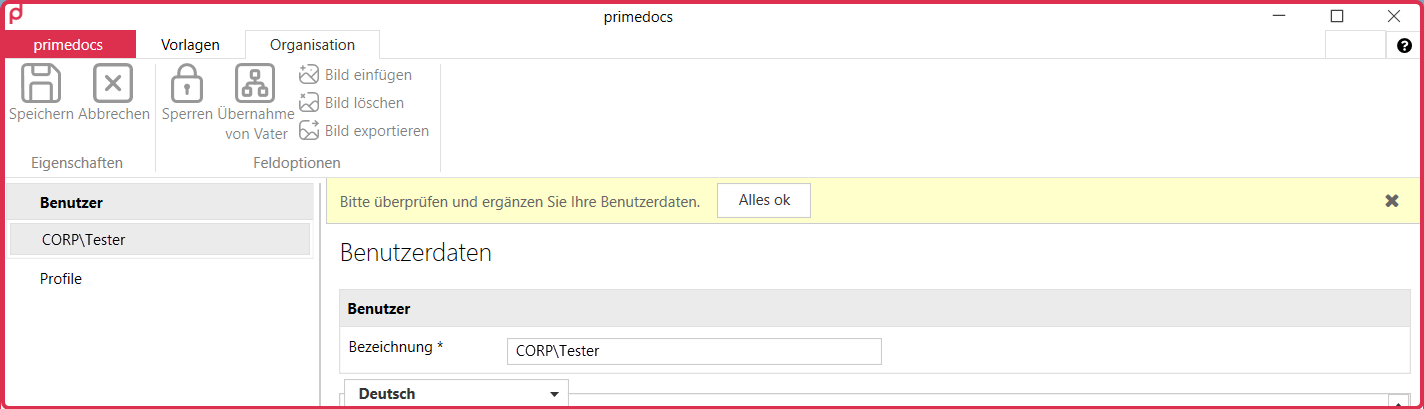
If you see incorrect data in the Users area, contact your internal IT support to have the data corrected in the source system. You cannot overwrite data in the Users area because the data is synchronized with the Active Directory every 24 hours.
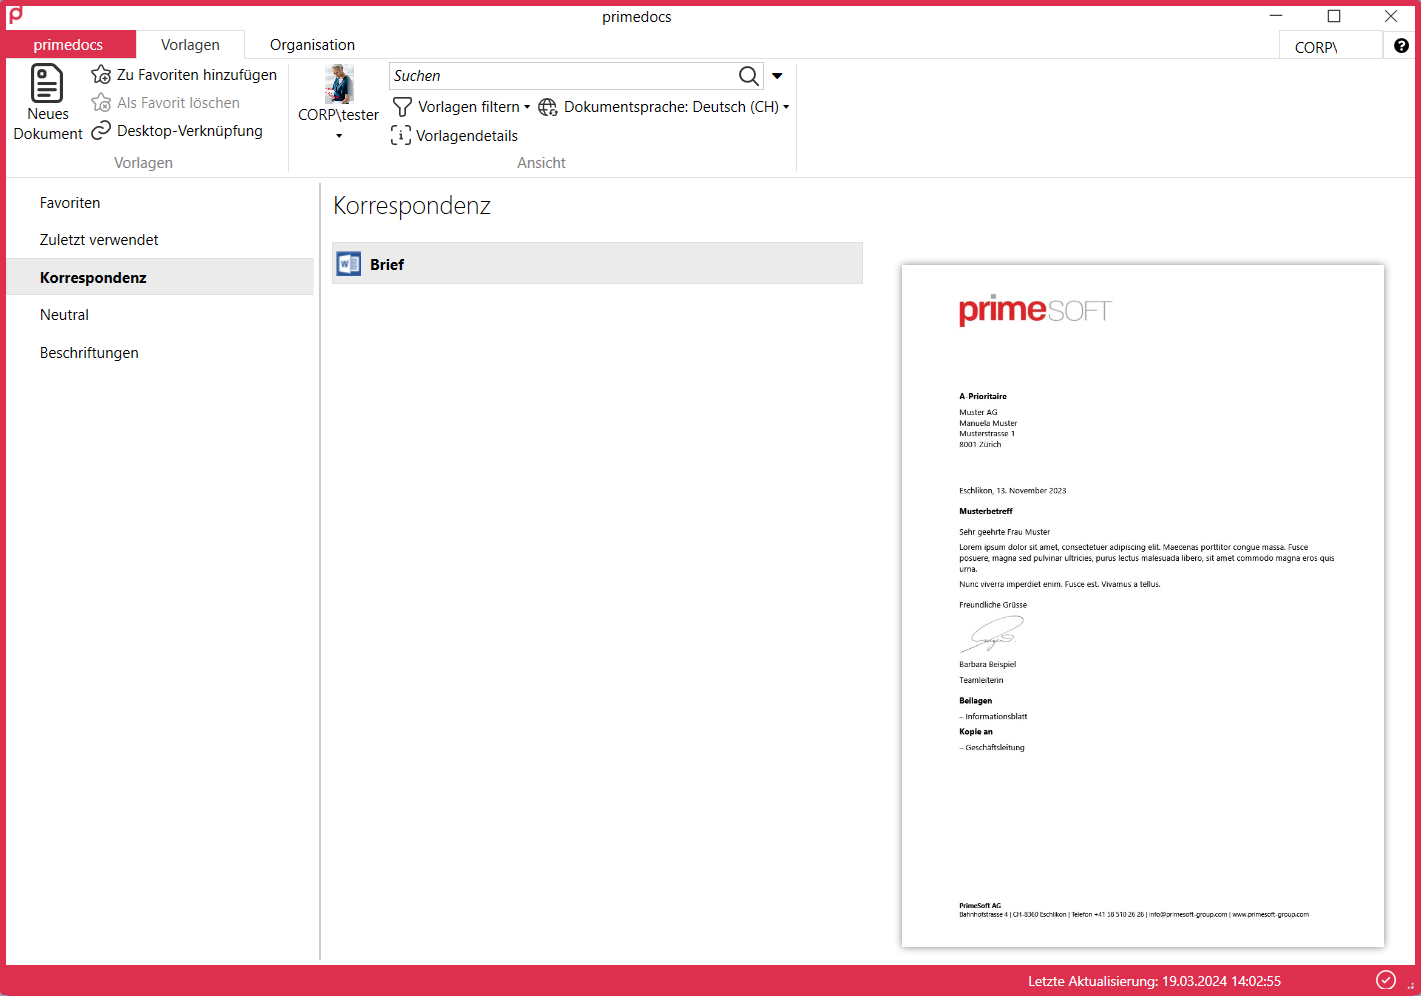
"Templates" tab
In the Templates tab, you will find all templates for all Office applications that have been implemented for your company.
Templates area
The templates are sorted by group in the area on the left. When you select a template group, you get an overview of the individual templates that are stored for you in this group.
You will only see the template groups that contain templates that have been shared with you.
Preview
When you click on a template, the preview for a document generated from this template opens to the right of the template list.
Create a new document
Open a template group and find the desired template. You can now generate a document from the template in the following ways:
- via the New document button (1)
- directly with a double-click on the title of the template (2)
- with a double-click on the preview (3)
- or with a right-click on the title of the template and via the context menu (4)
Depending on your profile, organizational unit and language, certain templates that have been shared with you are available.
Favorites
The Add to favorites button adds the selected template(s) to the "Favorites" template group. The Favorites template group contains your personal favorites. Use "Delete favorite" to remove a template from your favorites again.
Desktop shortcut
The Desktop shortcut button creates a desktop shortcut directly to the selected template. This is very practical if you regularly use one or two templates.
Profile selection
The button with your profile picture and profile name opens the profile selection. If you have several profiles, you can select which profile you want to use when generating a new document here.
Search field
In the middle of the client you will find the search field, which you can use to search for templates. Template names, descriptions, tags and tag descriptions are searched.
"Organization" tab
The Organization tab is the area where you manage your profiles.
Profiles area
Click on the Profiles area, where your profile data is located. Your profile is divided into two sections in the middle: your personal data (Users tab) and the data that comes from your organizational unit (Organizational units tab).
After you have made changes to your profile, don't forget to save your changes before leaving the tab by using the Save button or the Ctrl+S key combination.
Profile management
When you first use primedocs, a profile is automatically created.
- Go to the Organization menu in the Profiles category.
- Check all entries and complete your data if necessary.
Note that manually adjusted fields will no longer be overwritten until you reset them to "inherit" or manually adjust them again.
Create new profile
Select the "New profile" button in the Organization menu. Give the new profile a unique name so that you can identify it clearly later. Then enter all the required data and save your details.
Assign organizational unit
By clicking on the Organization menu and then clicking on Assign organizational unit, you can select the organizational units assigned to you.
Generating a letter
To generate a document from the letter template, double-click on the corresponding template.
Filling out the properties dialog
The Properties dialog, also known as the Forms dialog, opens a window with a data input screen. Properties for a specific document (e.g. recipient, subject, date, enclosures) are entered here, and entire documents are compiled depending on the template.
Complete the required information. Fields that you have to fill in are marked accordingly.
Use the tabulator to navigate easily from field to field. As soon as you have entered all the properties, click OK.
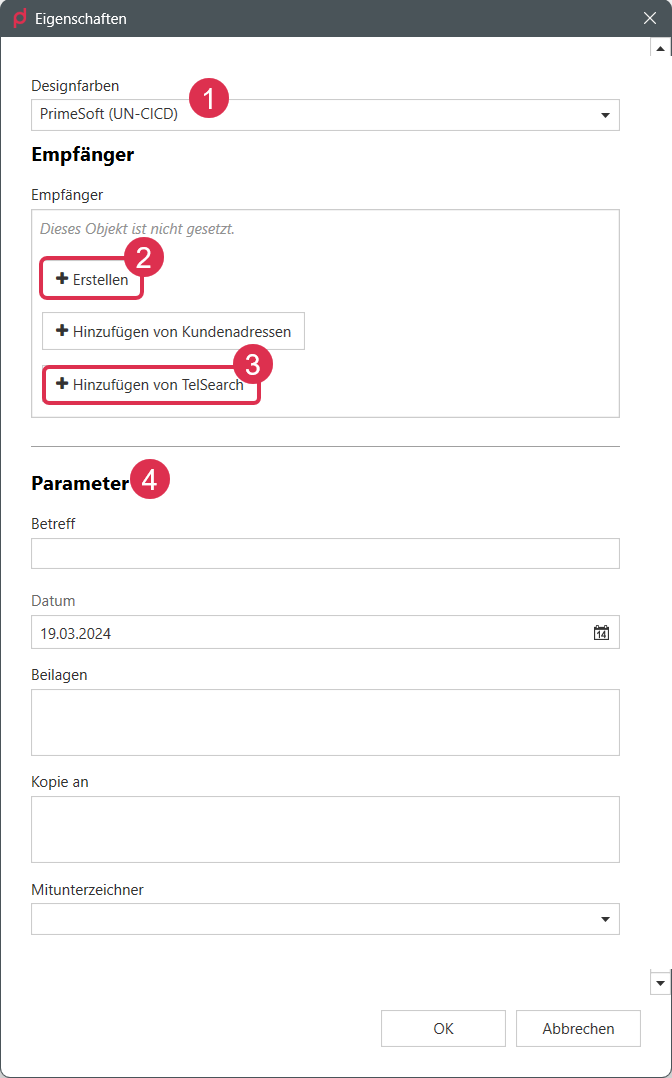
Design colours
This dropdown (1) is only displayed if several designs are available for the organization to which your profile is assigned.
Recipient
The recipient of the letter is entered in this section. Here you can choose whether you want to enter the recipient manually (2) or search for them in one of the data interfaces (3).
The names of the "Recipient" section in the example may differ from the names in your solution.
Create recipient
Would you like to create a new recipient manually? Click on the +Create button (2) in the Recipients section.
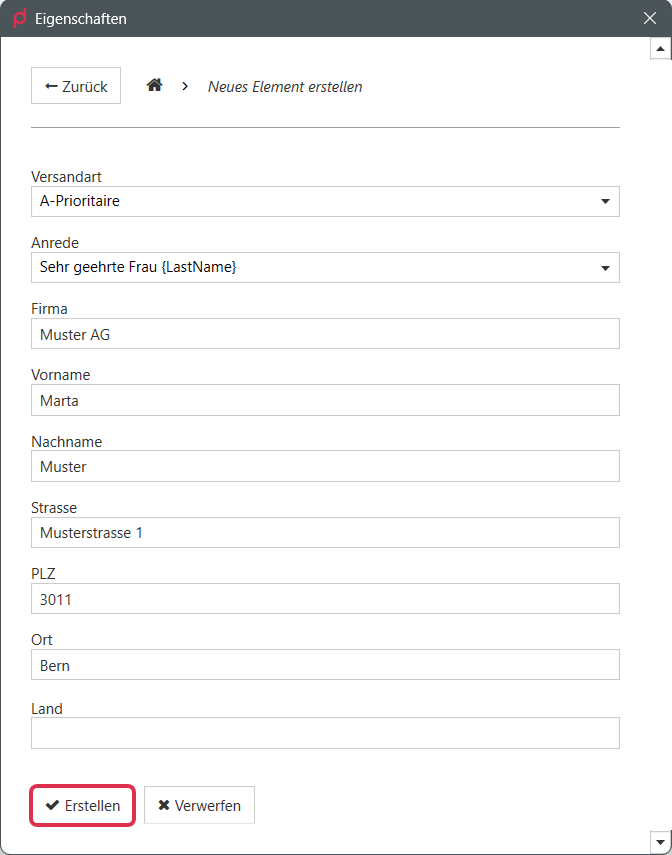
All information relevant to the recipient of a letter is requested here. Confirm your entries with Create.
Add recipient from data interface
In the Recipients section, click on the Add from [Name of data interface] button (2). Fill in the search parameters and click Search. Select the desired recipients and click Add selected entries.
"primedocs" tab
In addition to the two tabs mentioned above, there is also the "primedocs" tab.
Account menu
- Under User information you can see whether you are connected to the primedocs server.
- Under Change data source, you have the option of switching the primedocs instance and resetting the data source.
Options menu
- Select skin: Select a colour theme.
- Start automatically: Indicates whether primedocs is started automatically when your device starts.
- Hardware acceleration: The primedocs client uses the hardware acceleration of Windows and its graphics driver.
- Languages: Change the interface language of primedocs here.
Help menu
- primedocs user manual: opens your browser and leads to the primedocs user manual.
- Send report: log and diagnostic data are packaged and can be sent.
- primedocs log files: the log directory contains all log files.