Set up your user profile
A profile is the combination of your personal user data and the data of an organisational unit. Every document you create is generated through a profile — it defines who the document is "from" and which organisational context it belongs to.
Users and profiles
Every primedocs user can have one or more profiles:
- User — your personal account, linked to your Active Directory or Entra ID identity. There is exactly one user account per person. The user fields are synchronised automatically from the directory.
- Profile — attached to your user account and linked to an organisational unit (department, team, etc.). A profile is created automatically when you first use primedocs.
Setting up a profile
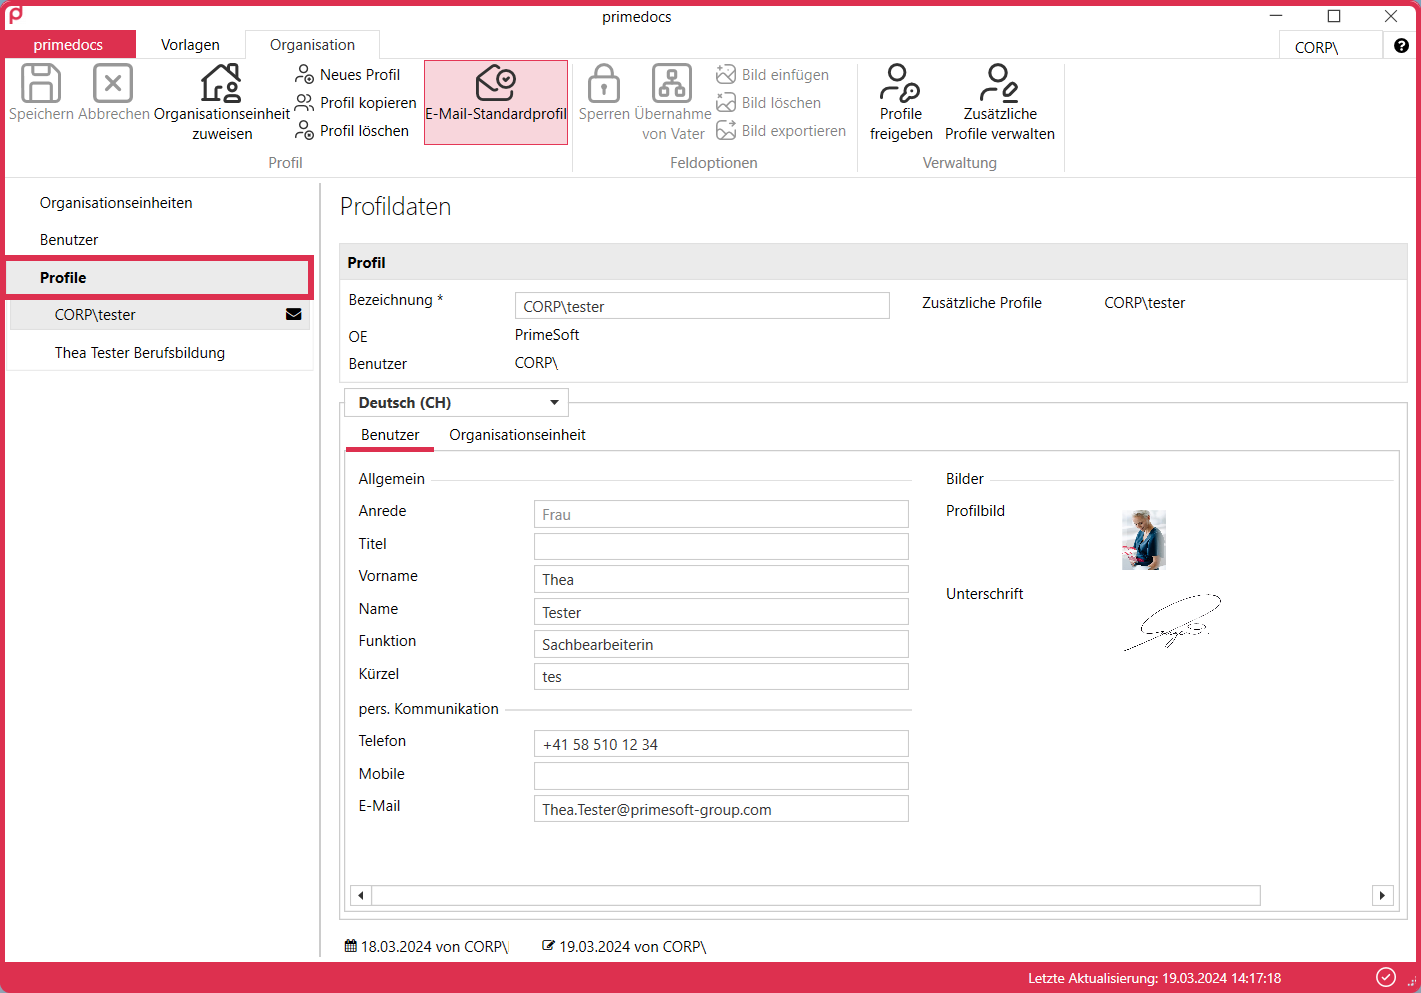
After the setup wizard, you are on the Organisation tab. Click Profiles on the left — your automatically created profile is displayed.
Renaming a profile
Click in the Description field and replace the automatically inserted user name with a meaningful description. We recommend including your name or initials (e.g. "PMuster – Main profile"). This matters later if you share the profile for deputisation. Then click Save.
Checking profile fields
Check that all fields are filled in correctly, and complete any missing details directly in the available fields. Then save.
Profile fields are divided into two categories:
- User fields — personal data such as first name, last name, title, phone number, and email. They can only be changed in the User area.
- Organisational fields — data from the linked organisational unit, such as company name, department, address, and logo. You do not change these directly, but via the Assign organisational unit button.
If you have manually changed a user field, the text in it is shown in black instead of dark grey. Manually adjusted fields are no longer overwritten automatically. To repopulate a field with the directory data, click in the field and then click Inherit from parent.
Creating an additional profile
If you hold several functions in your organisation, you can create additional profiles. Proceed as follows:
- Click Copy profile. The current profile is duplicated.
- Assign a new description (e.g. "Simon Küttel – SIBE").
- Adjust the title and other relevant fields (e.g. phone, email).
- Assign a different organisational unit if required.
- Click Save.
Setting a default profile
If you have several profiles, one is marked with an envelope icon as the default profile — it is used when you do not select another profile. To make another profile the default, select it and click Email default profile in the ribbon. Then save.
Images in the profile
The Insert image, Delete image, and Export image buttons can only be clicked when an image field is selected (e.g. Signature or Profile picture, where available).
Sharing a profile (deputisation)
With Share profile, you share a profile with another person so that they can create documents in your name or use your profile as a second signature. Typically, you add a person and grant them the right to assume your identity in correspondence — this corresponds to full deputisation.
This function is purely a convenience feature: creating a document in the name of another person is possible in the Word document anyway. Sharing merely makes it more convenient and more traceable.
Managing additional profiles
Via Manage additional profiles, you choose which of the profiles shared with you are selectable and in which order they appear for selection.
Switching profiles
The active profile determines which data appears in newly generated documents.
- In primedocs Web and the Office Web Add-In, click your name or profile picture to open the profile selector.
- In primedocs Desktop, use the button with the profile picture and description in the Templates tab, or the Organisation tab.