App Service
App Service Plan Creation
Create an “App Service Plan”:
During creation, select “Windows” as the “Operating System”.
Pricing Tier
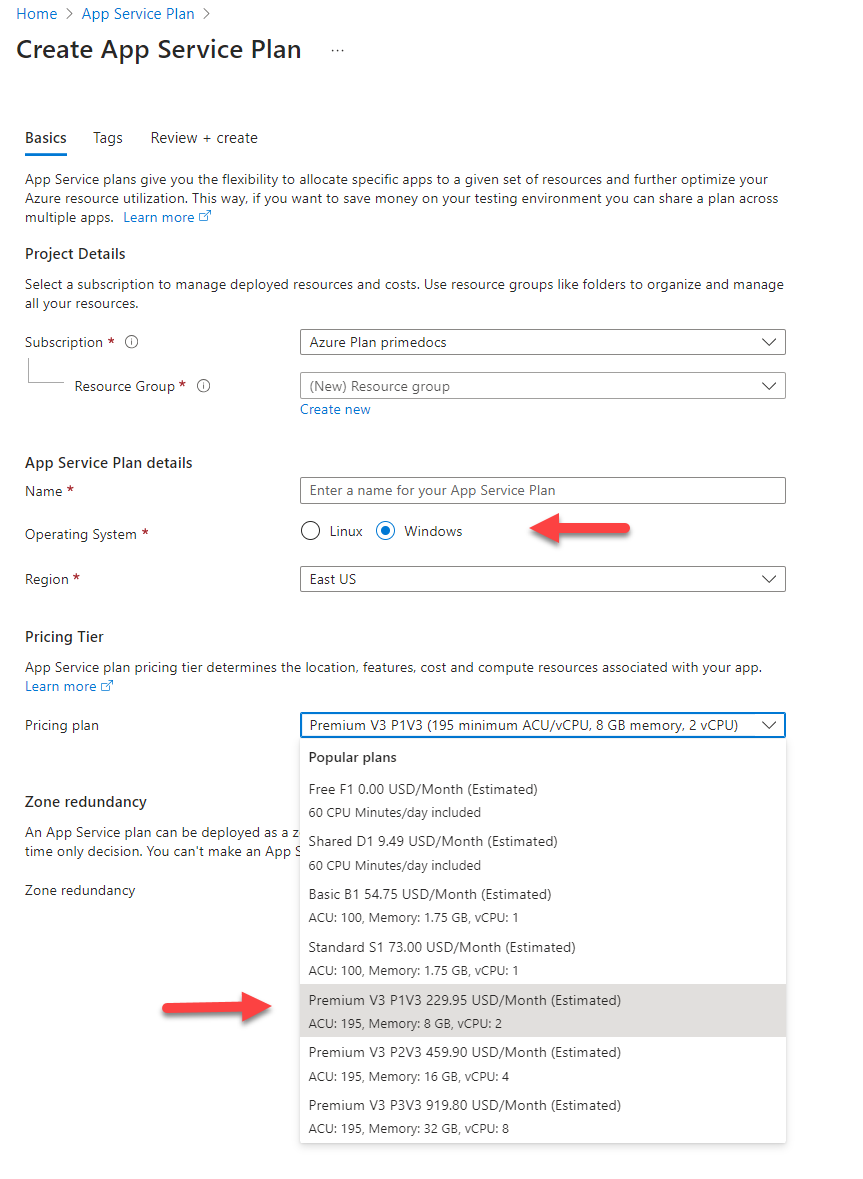
Recommendation: The "Premium V3 P1V3" plan is also suitable for larger installations. However, cheaper entry-level plans are also possible.
Web App Creation
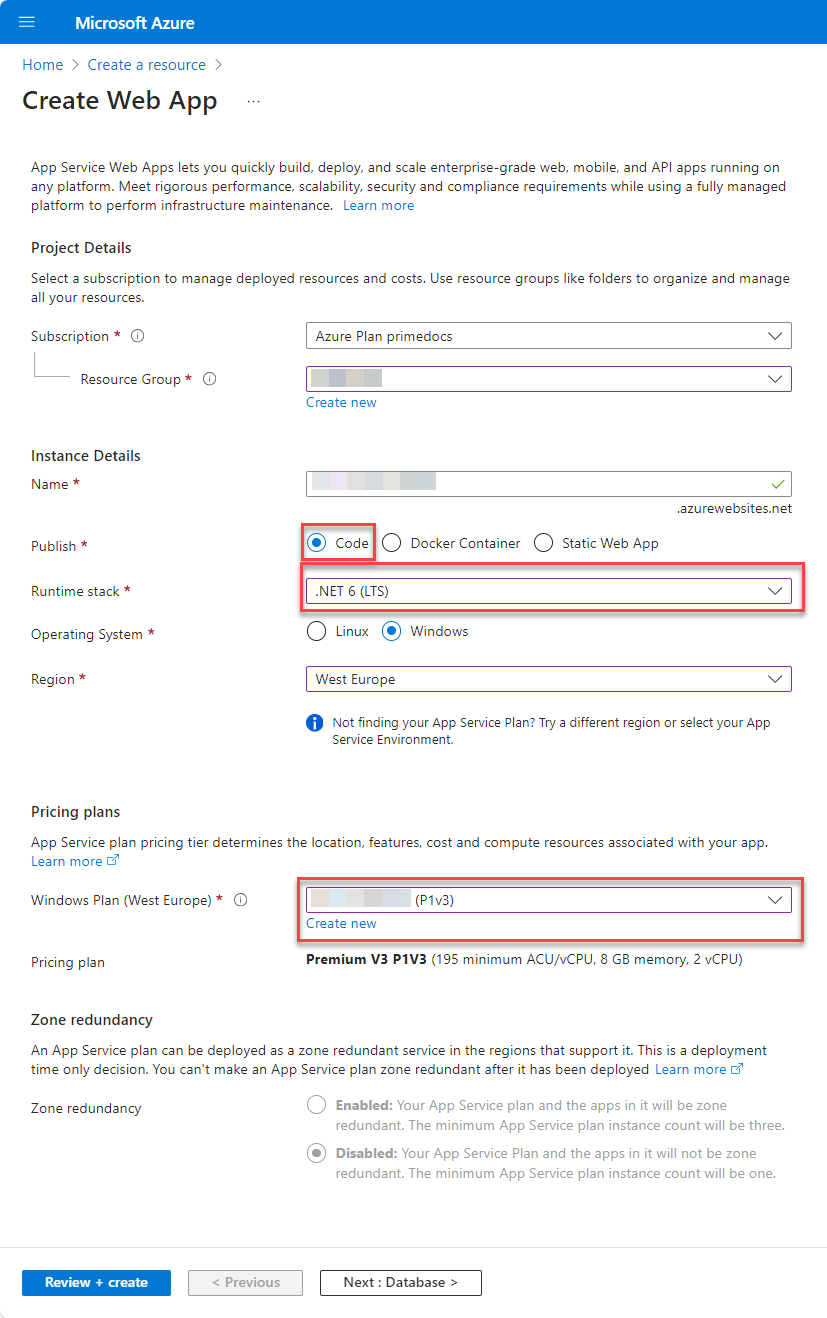
After creating the “App Service Plan”, create a “Web App”.
We recommend the following settings:
- Select any name - usually an alternative DNS entry is created, which is communicated to the users.
- Under Publish, select the Code option.
- Under Runtime stack, select the .NET 8 (LTS) option.
- Select the Windows plan you have just created.
Web App Configuration
Application settings
Enter these three options in “Application Settings”:
| Name | Wert |
|---|---|
| PrimeDocs_Config_URL | https://[Storage-Account-Name].blob.core.windows.net/primedocs-customer/{FILENAME} |
| SCM_POST_DEPLOYMENT_ACTIONS_PATH | c:\home\site\wwwroot |
| WEBSITE_LOAD_USER_PROFILE | 1 |
For the PrimeDocs_Config_URL entry, use the storage account name from this step: Storage Account.
Example entry: https://primedocscustomer.blob.core.windows.net/primedocs-customer/{FILENAME}
Path Mappings
The following paths must be configured - Make sure that you create the new entries as "Application":
| Virtual Path | Physical Path | Type |
|---|---|---|
/ | site\wwwroot | Application |
/service | site\wwwroot\Service | Application |
/addressservice | site\wwwroot\AddressService | Application |
/adminapp | site\wwwroot\AdminApp | Application |
/app | site\wwwroot\App | Application |
/connect | site\wwwroot\Connect | Application |
/datasourceadminapp | site\wwwroot\DataSourceAdminApp | Application |
/docs | site\wwwroot\Docs | Application |
/healthmonitor | site\wwwroot\HealthMonitor | Application |
/ids | site\wwwroot\IdS | Application |
/webapi | site\wwwroot\WebApi | Application |
Identity
Activate the Managed Identity (System Assinged):
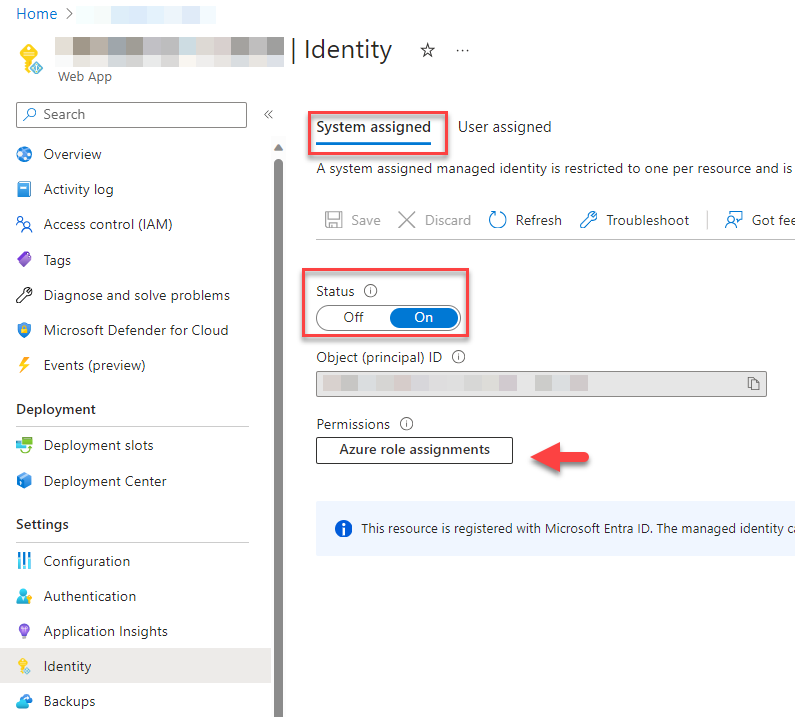
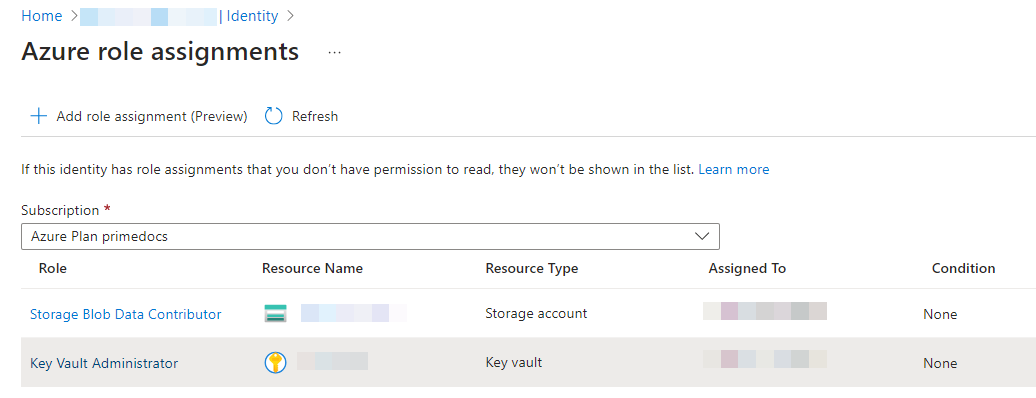
Now assign the following roles via "Azure role assignments":
- Select the created Storage Account from this step and select
Storage Blob Data Contributor. - Select the created Key Vault from this step and select
Key Vault Administrator.
It should look like this afterwards:
URLs and HTTPS
Store any domain and a certificate using the tools provided by the Azure portal.
The selected domain must be stored in the App Service as well as in the Entra ID App Registrations and in primedocs.config.